Create a dbt model
A dbt model is composed of two files:
- a SQL file containing the SELECT statement that queries your database, and
- the YAML file that holds the model configuration.
You can create a dbt model in Y42 via the List mode or the Code Editor. Using the List mode is convenient for models with many properties, as the graphical user interface streamlines the process of configuring the asset. On the other hand, the Code Editor offers full flexibility to customize models through granular control of YAML-defined configuration files.
Anything you define in the Code Editor is rendered in the List mode and the Data Lineage views and vice versa. These modes simply offer different representations of your Y42 project, allowing you to interact with your data in a way that suits your workflow.
Create a dbt model in List mode mode
When you create a dbt model in List mode mode, Y42 automatically generates a SQL and YAML. You can view these files via the Code Editor.
Create a dbt model in Code Editor mode
By default, models are defined inside the /models folder. Although you can specify other model paths in dbt_project.yml, we recommend keeping the default project settings.
Add a .sql file
Navigate to the Models folder. Click the "new file" icon or right-click on the folder to create a new model file. Assign a name to the model and use the .sql file extension.
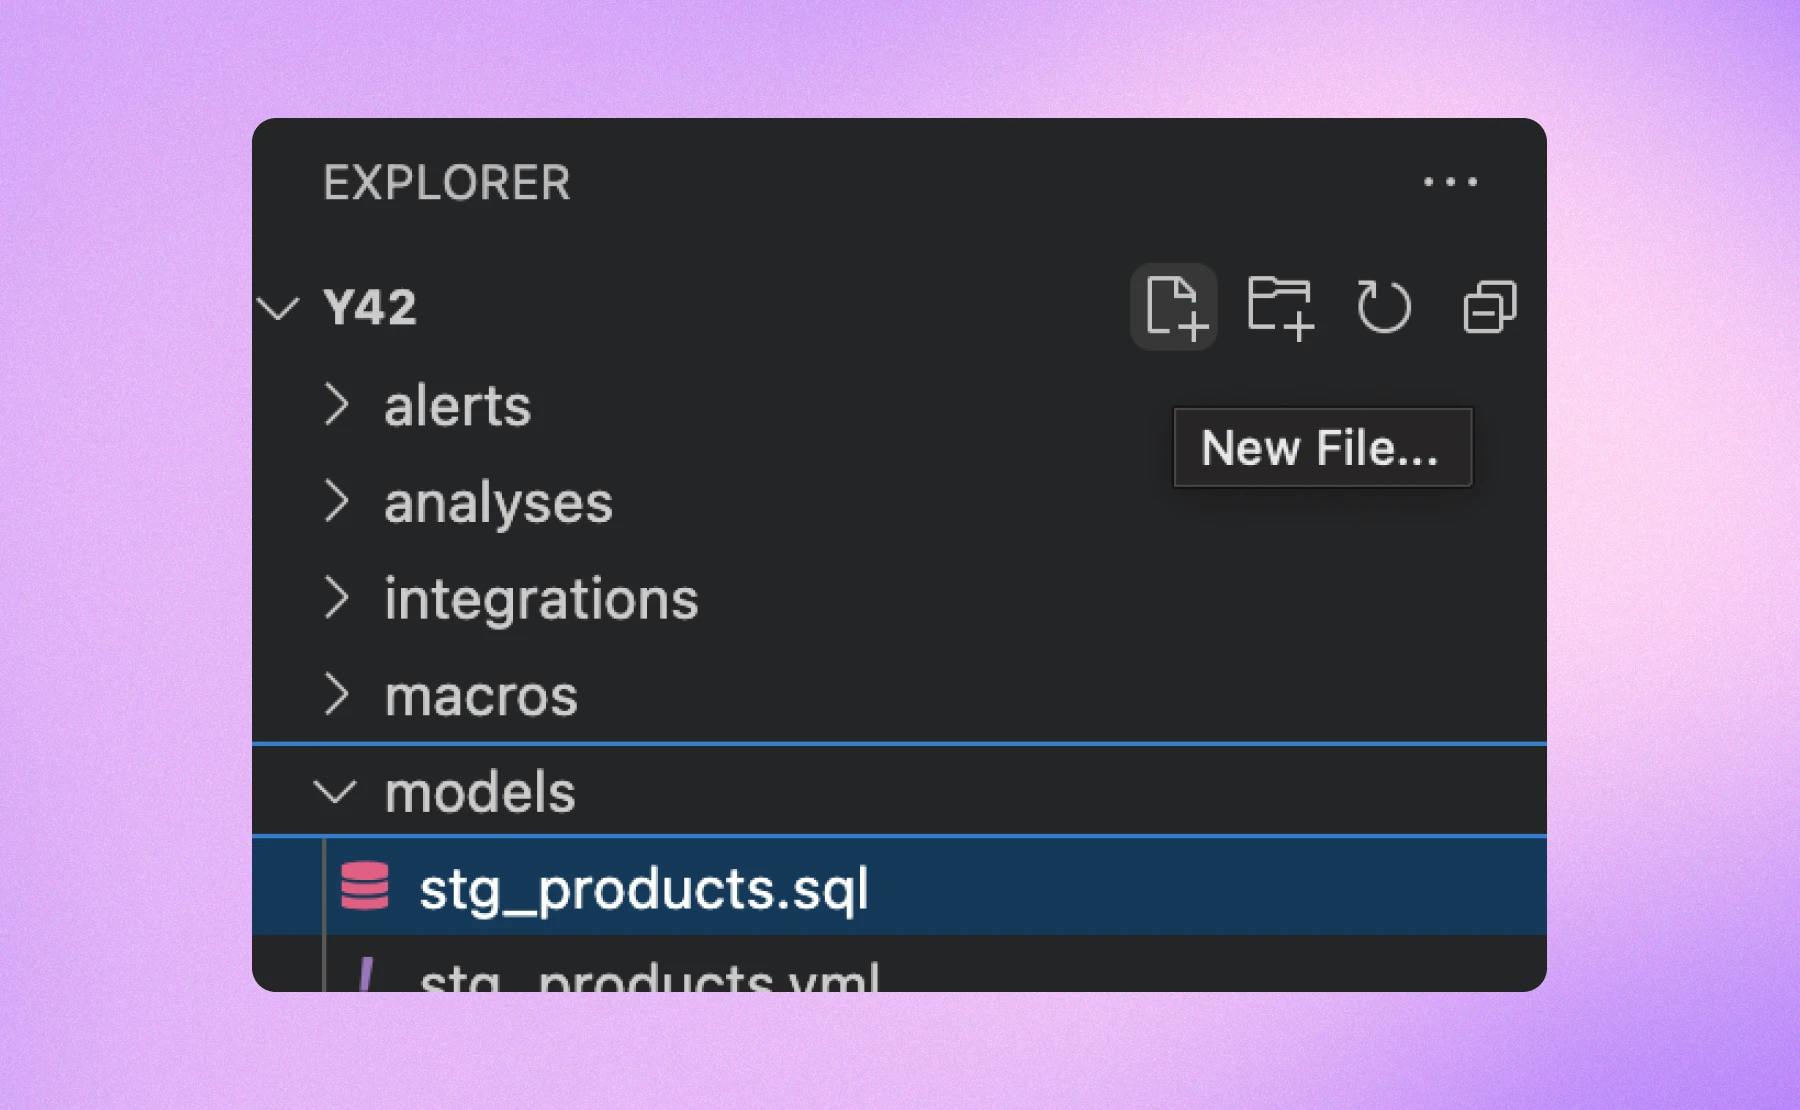
Create new dbt model.
Configure the model
A model consists of a .sql file and its corresponding configurations, which include properties such as metadata, materialization logic, tests etc. While you can define model-specific configurations using a configuration block in the .sql file, we recommend placing them in a .yml file.
Note that configurations prioritized by order of specificity and applied hierarchically and are. Generally, configurations defined in the .sql file will take precedence over those defined in .yml files, which in turn overrides configurations defined in the project file.
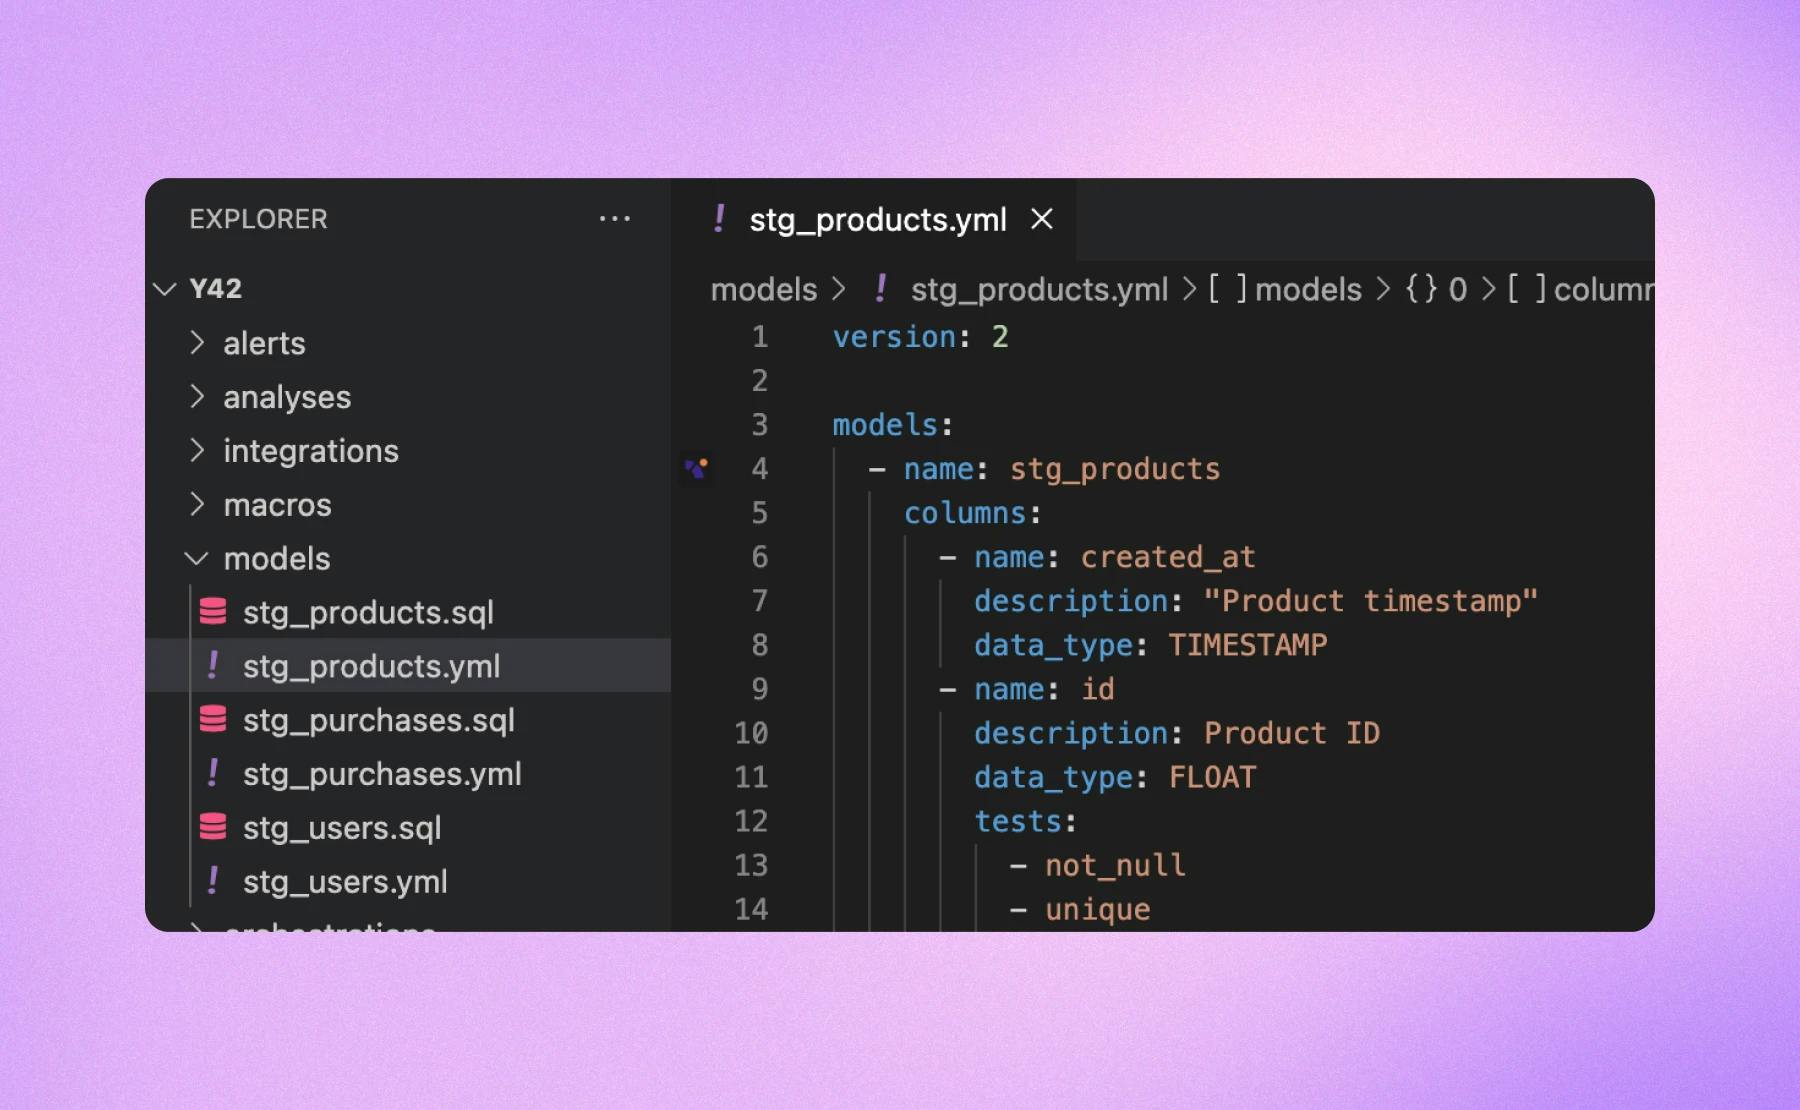
Configure dbt model.
Preview the model
You can verify the model's logic using the preview function, located at the bottom-right corner of the browser window.
However, note that some queries that work in the preview but may fail when you run the model job. For instance, Y42 adds the snippet create or replace view <view_name> (<your_query>) when running the job. This difference might cause the compiled query and the query run against your data warehouse to differ.
ref macros into unique table identifiers. This ensures your assets point to the correct tables in the data warehouse. 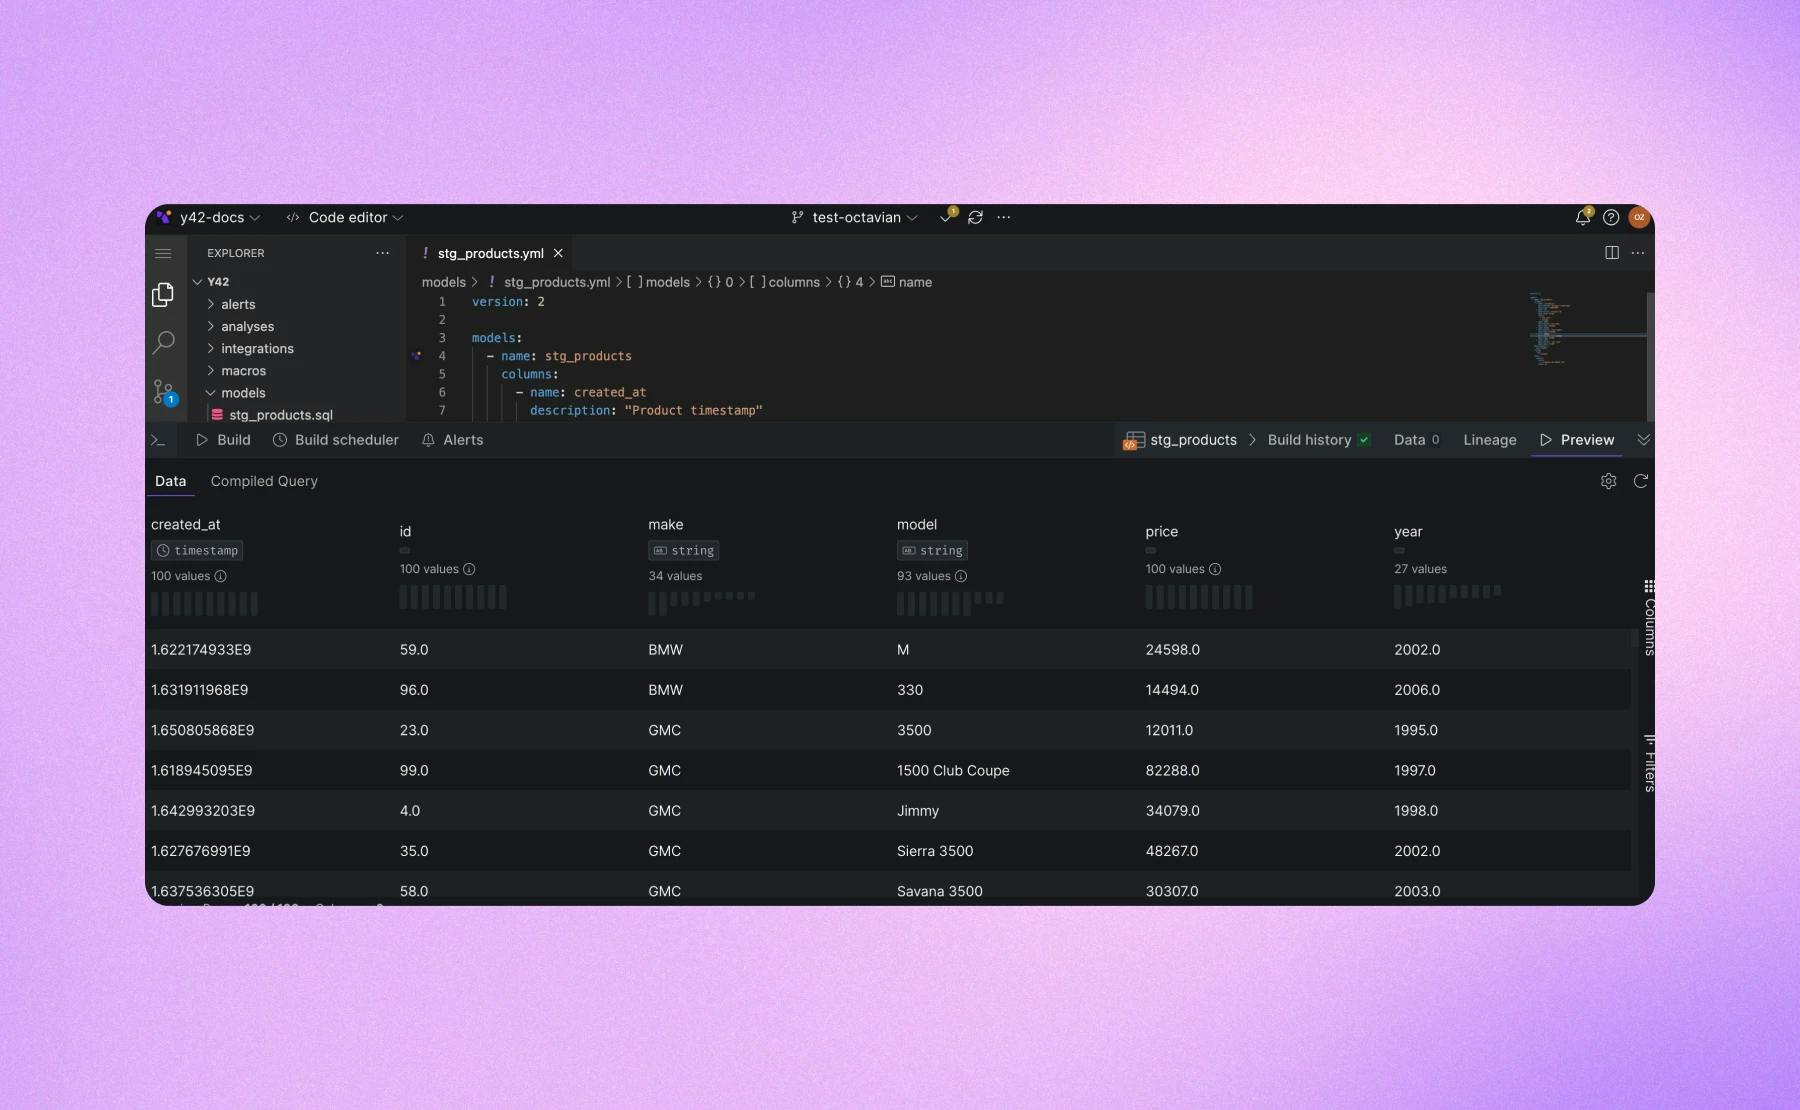
Preview the model.
Commit and build the model
Commit the model using the Git interface, which can be accessed via the top navigation bar. Then, build the model using the Build drawer at the bottom of the browser window. You can either trigger a build manually via the Build history tab, or use the y42 build command.
After the build has completed, you can preview the materialized table or view using the Data tab in the Build drawer.
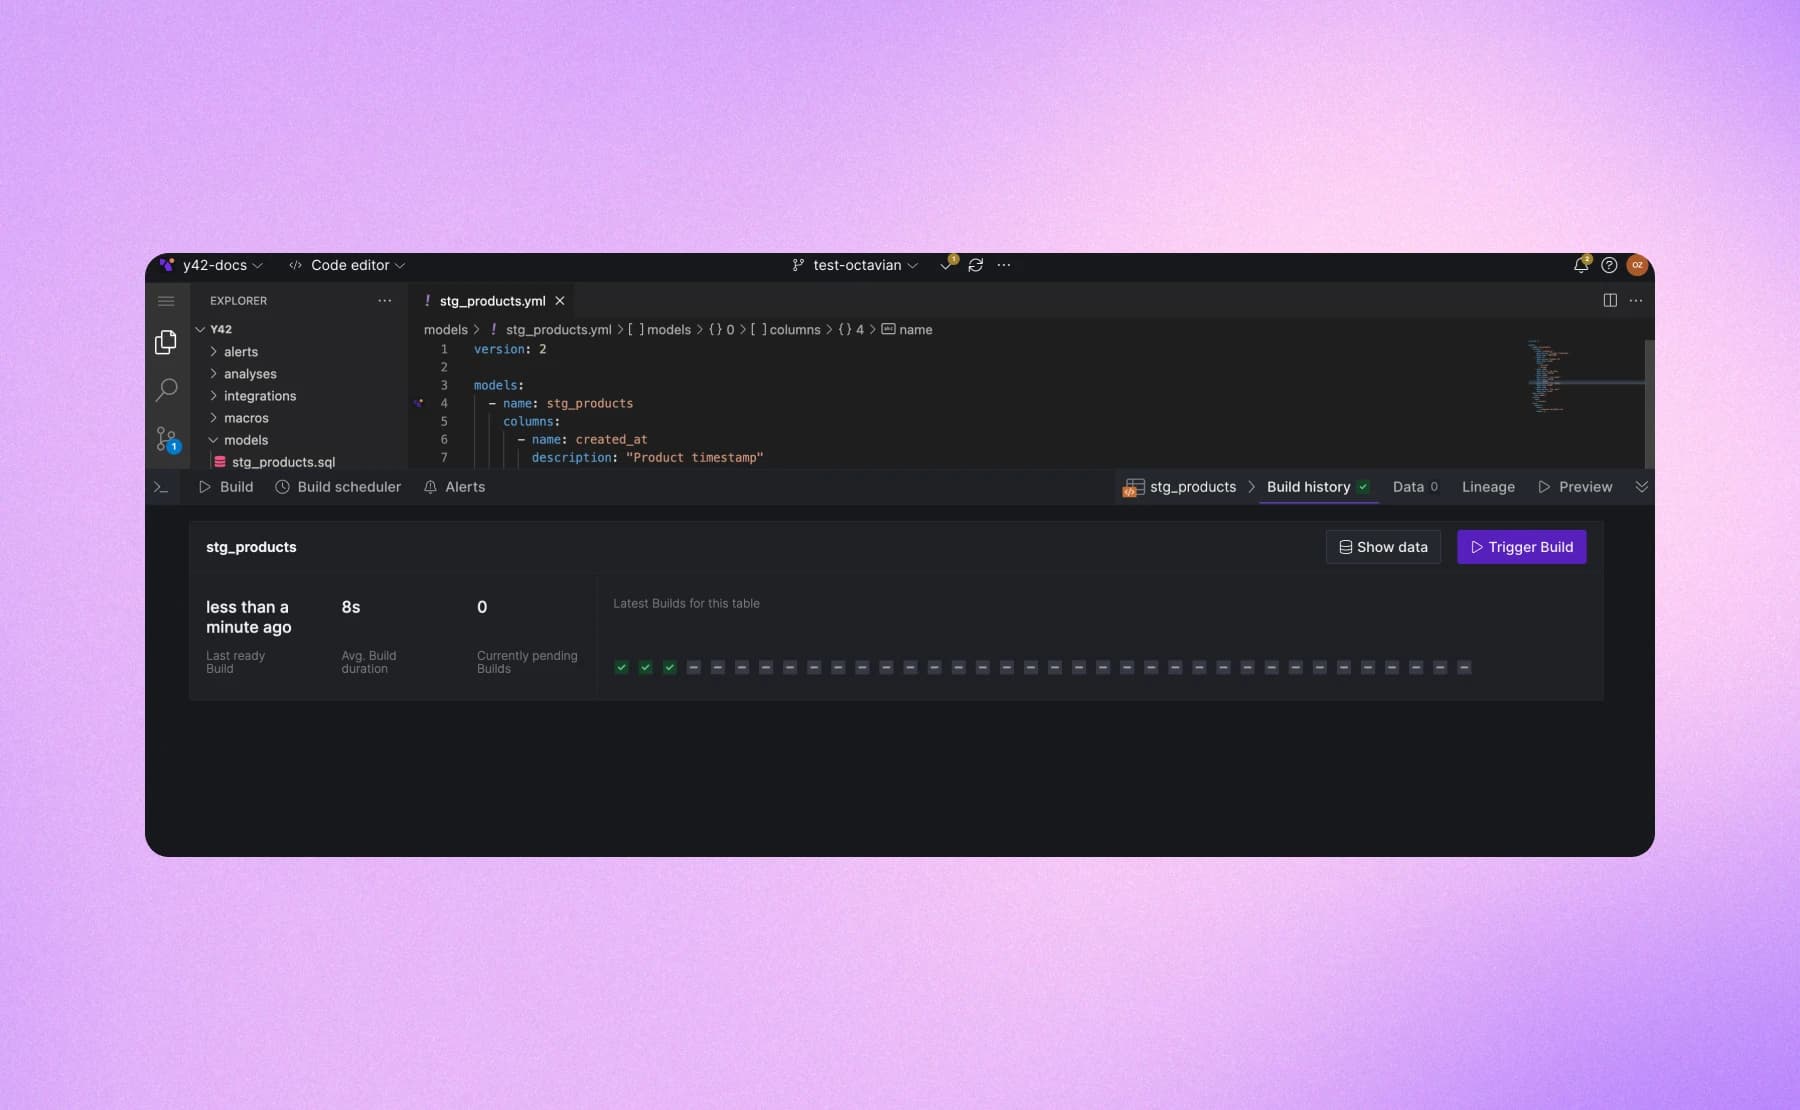
Build history tab in the Build drawer.
Writing SQL queries
Reference a source
Reference a model
<dataset_name>.<table_name>. Use the reference function instead. Organize your SQL code with CTEs
To improve the readability of your SQL code, consider using Common Table Expressions (CTEs). CTEs are temporary query results that can be re-used within the broader scope of the entire model.
FAQ
What SQL dialect should I use for my models?
You should use the SQL dialect of your underlying data warehouse - either BigQuery or Snowflake. Additionally, you can add macros using the Jinja templating language. Your Jinja will be compiled into your data warehouse dialect before the query is executed.